Saturday, March 12, 2011
Embossed Paper - Free Photoshop Tutorial and Full Size Examples
Create a new paper 3600x3600 300 DPI

Create a New Image 3600x3600 300 DPI.
Fill the Bottom (Background) layer with the color you want (1)
Create a New Layer above the Background (2)
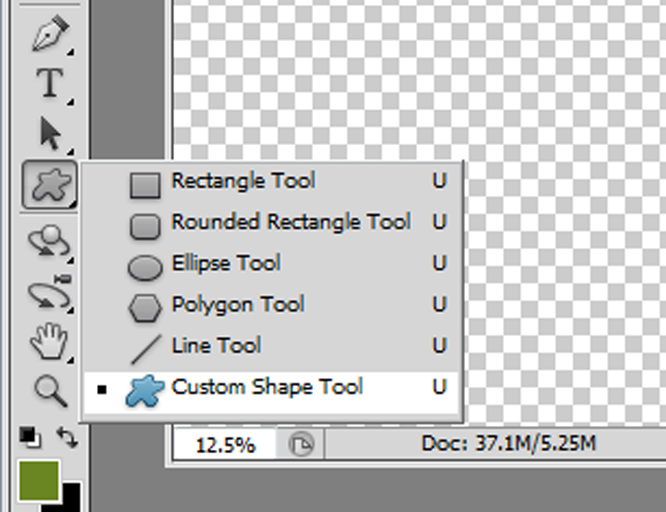
Go to Shapes = Custom Shape Tool.

Using the Dropdown box (1) choose a custom shape. I'm going to use the Sun Shape (2).

Draw your design how ever you want it on the paper. It doesn't matter what color you choose, it won't show up anyway.

Go to the Layers Pallet and Turn the Fill to 0 on the Layer with the Design (1)
You'll notice the image is gone, don't worry, we'll get that back in the next steps.

Double Click on the Layer Thumbnail to bring up the Blending Options

To do the Emboss Down you would choose the settings I have here.
When it comes to the Shading choose the same color as your background for the highlight and a darker shade of that color for your shading.

Now go to the Inner Shadow and give it a little Inner Shadow (using the same color you did for the Shadow in this step.
That's it for the Emboss - Down.
To do the Up follow the next steps.
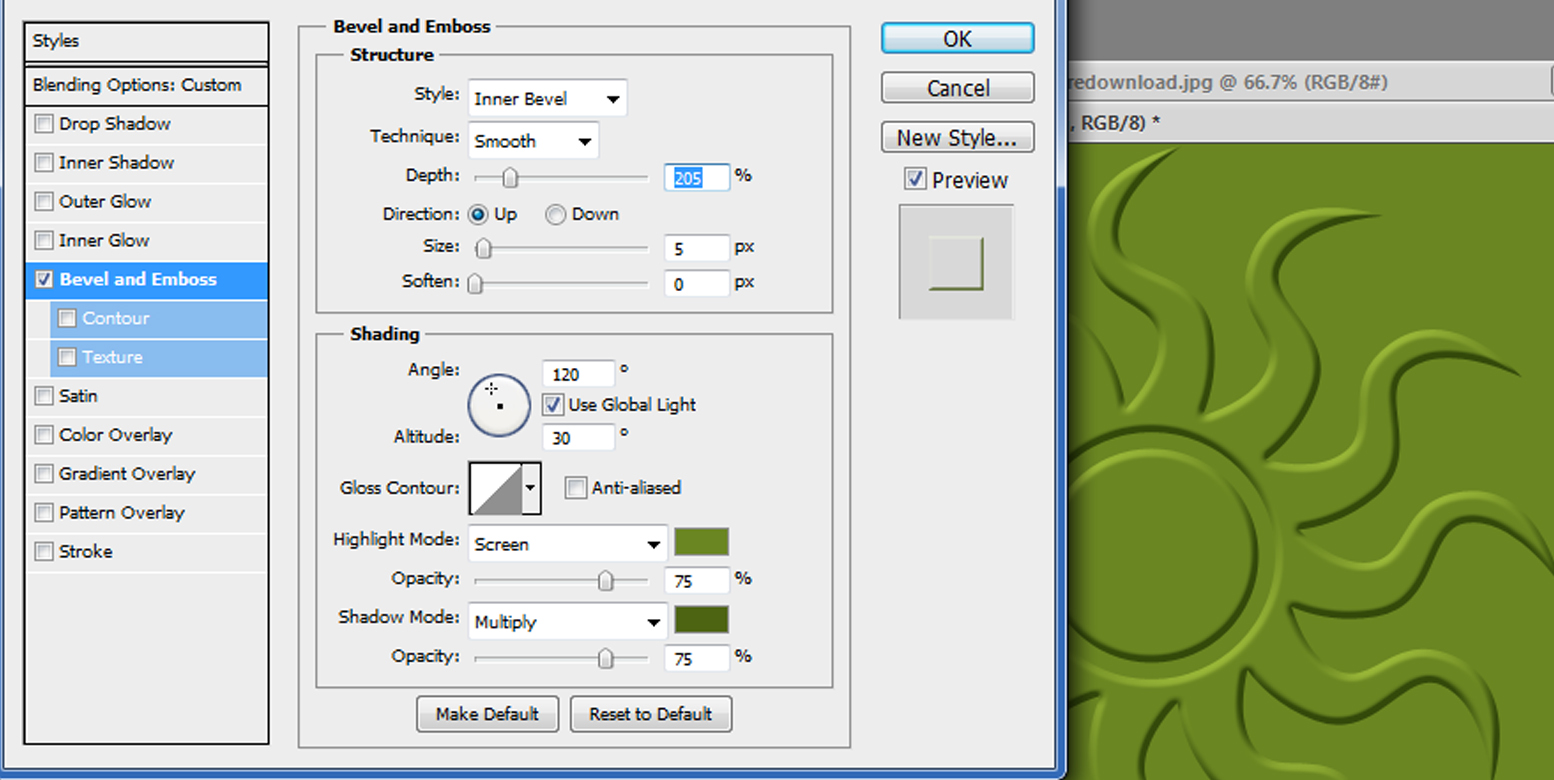
Going to the Blend Options as you did in the previous step go to the Bevel and Emboss tab and use the settings I have here.
Use the same color as you chose for the background for the Highlight and a darker shade of the color you chose for the background for the Shading.
That's it for the Embossing - Up.

You can download the examples I used in this tutorial here.
I would love to see what you create with this tutorial
Thank you!
Subscribe to:
Post Comments (Atom)
Proud Designer for


Grab My Blinkie

 >
>

8 comments:
Thank you so very much for this tutorial. I can't wait to try it...I love learning new things in PS as I am very new at it. Thanks again!
Thank you for sharing your great tutorial. Now off to see if I can do this.
Great tutorial! i will have to use this one!
was very interested in this tut, however, my old eyes could not read the settings in the blending options panel to do the embossed paper.
Ursulah... if you click on the image itself it will bring it up larger for you. (I did that for my old eyes!) :)
If you want me to put the settings in the tut as well let me know... I will be happy to do that for you!
I've been looking for a tutorial to make embossed papers and was thrilled when I found this one. But...I have PSE and can't figure out how to do it. Can you tell me how to do it in PSE 7 please? Thanks so much!
I wish I could help you but I have never used PSE. I forwarded this to a friend of mine who uses it. I will let you know when I hear back from her. Or, it might just be time for me to get it and learn to do this... I heard it shouldn't be too hard if you know PS... (Crossing my fingers)
Such a great tutorial that is. its really very help me. thanks for sharing.
Clipping Creations India | ecommerce image editing service
Post a Comment